
Ready to embark on a delicious voyage with your taste buds? Say goodbye to preservative-filled jams from the store and hello to handmade, nutritious bliss! Your favourite fruits can be turned into a tasty and wholesome spread with just a few basic ingredients and procedures. Roll up your sleeves, don your apron, and let’s start playing! Let’s look at the recipe for making healthy jams that Health Shots has provided.
No matter if it is with bread toast or a paratha, kids enjoy jam with everything. Moreover, jam for breakfast is quick but unhealthful. Store-bought jams are loaded with artificial flavours, preservatives, and a tonne of sugar and lack the natural goodness of fresh fruit. So, the simple solution to keep our kids healthy is homemade jams with no sugar! Making healthy jams at home can be an enjoyable and rewarding experience, and the best part is you have control over the ingredients used.
Here are the steps to make your own healthy jams at home:
1. Choose your ingredients
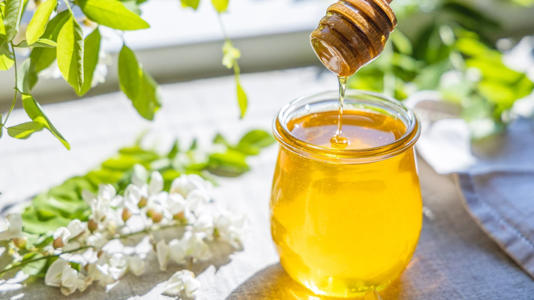
The healthiest fruits to use while making jam include berries (strawberries, raspberries, and blackberries), stone fruits (peaches, plums, and apricots), and tropical fruits (mangoes, papayas). You’ll also need a natural sweetener such as honey or maple syrup, and a natural thickener such as chia seeds.
2. Prepare the fruit
Remove any seeds, stalks, or rough bits from the fruit after washing and chopping it into small pieces. You must cook tougher fruits like peaches first to soften them if you plan to use them.
3. Sweeten the fruit
The fruit should have your natural sweetener added to it. Let it settle for a few minutes. This will enable the sugar to dissolve and some of the fruit’s natural juices to come out.
4. Add the thickener
Add the chia seeds or another all-natural thickener and combine. Chia seeds will take up the fruit’s moisture and turn it into a thick, gel-like consistency.

5. Cook the jam
Put the fruit mixture in a saucepan, heat it over medium heat, and stir frequently. The jam will thicken and decrease as it boils. Depending on the fruit you’re using, this procedure should take between 10 and 30 minutes.
6. Test for doneness
Place a little spoonful of jam on a dish and let it cool for a minute to see whether it’s finished cooking. It is prepared if it maintains its shape and doesn’t move.
7. Cool and store
Transfer the jam to a fresh, airtight jar after allowing it to cool fully. For a month, it can be kept in the refrigerator.
advantages of home-made jam
Jams made with fresh fruits and natural sweeteners can offer several health benefits.
1. Nutrient-rich: Fruits contain essential vitamins and minerals, and making your own jam allows you to retain more of these nutrients compared to store-bought options.
2. Low in sugar: By using natural sweeteners like honey or maple syrup, you can control the amount of sugar in your jam, making it a healthier alternative to store-bought options.
3. Antioxidants: Berries, which are a popular fruit used in jam, contain high levels of antioxidants which help to protect against cell damage.
4. Fiber: Fruits are a natural source of fiber, which is important for digestive health.
5. No preservatives: Homemade jam is free of artificial preservatives, making it a healthier choice for you and your family.
By making your own healthy jams at home, you can enjoy a delicious spread that’s free of preservatives and loaded with healthy ingredients. So why not give it a try today and start spreading the love?
source from: msn.com
